OpenRCT2-RideVehicleEditor
A plugin for OpenRCT2 that lets you edit vehicles on any ride in your park on the fly.
Author:
 Basssiiie
Submitted:
over 5 years agoUpdated:
11 months agoStars:
41Tags:
License:
MITLinks:
GitHub Repository Basssiiie on GitHubRideVehicleEditor plugin for OpenRCT2
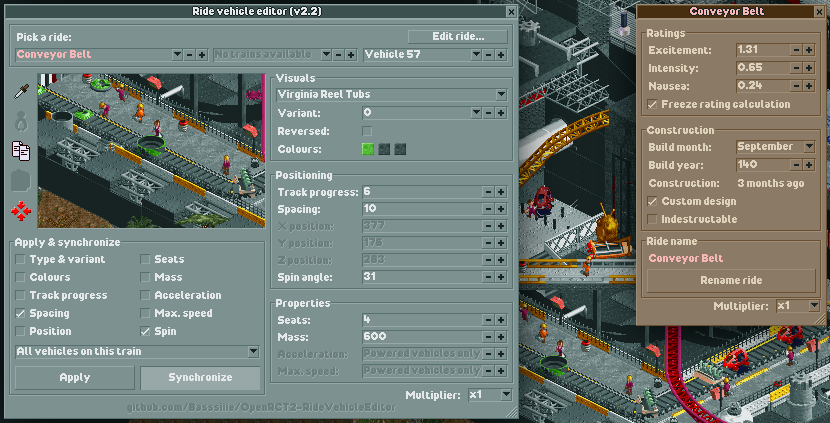
This plugin lets you edit vehicles on any ride in your park on the fly.
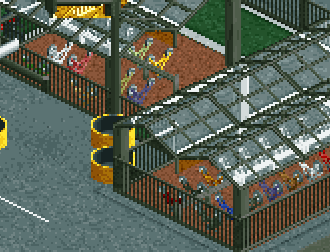
Factory conveyor belt made by TimmyTuner
Current features
- Select and switch through all ride vehicles in your park, or use the picker to click on the vehicle directly.
- Modify properties like vehicle type, colour, mass, number of seats, (powered) acceleration of each vehicle.
- Switch through different variants of the same ride type. (E.g. locomotive, tender or passenger car.)
- Modify the track position of or spacing between different vehicles on the same train.
- Pick up and move stationary vehicles to different places on the map.
- Copy and paste the settings of a vehicle over other completely unrelated vehicles.
- Easily apply your changes to all vehicles on the train or the ride, or update multiple vehicles at the same time.
- Edit and freeze the ride's excitement, intensity or nausea ratings.
- Speed up your editing with various configurable shortcuts.
- Supports multiplayer!
Planned features
- Please submit any ideas under Issues.
Installation
- This plugin requires at least OpenRCT2 version v0.4.21.
- Download the latest version of the plugin from the Releases page.
- To install it, put the downloaded
*.jsfile into your/OpenRCT2/pluginfolder.- Easiest way to find the OpenRCT2-folder is by launching the OpenRCT2 game, click and hold on the red toolbox in the main menu, and select "Open custom content folder".
- Otherwise this folder is commonly found in
C:/Users//Documents/OpenRCT2/pluginon Windows. - If you already had this plugin installed before, you can safely overwrite the old file.
- Once the file is there, it should show up ingame in the dropdown menu under the map icon.
Inspirations!
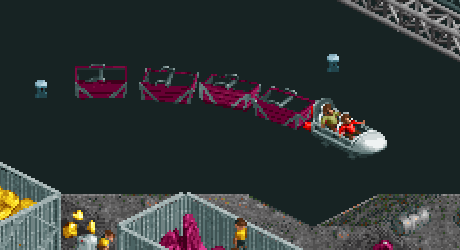
Here are some inspirations and examples of what you can do with this plugin.
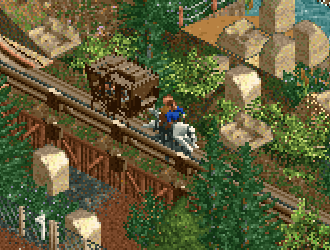
 Toy machine, by Manticore |
 Parking lot, by Fidwell |
|---|
 Bicycle parking, by Enox |
 Space mine train, by Deurklink |
|---|
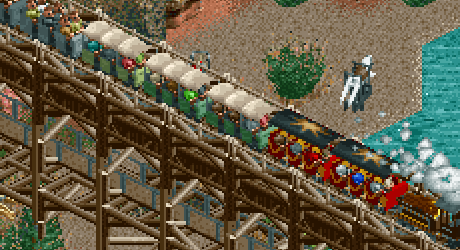 Train with different carriages, by Emiel |
 Shark chasing row boat, by Deurklink |
|---|
 Horse carriage, by Zarathustra |
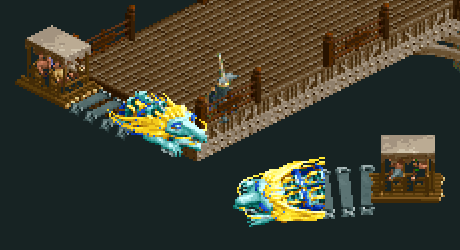 Dragon ships, by Mamarillas |
|---|
See it in action
The plugin was featured in these plugin recommendations / rankings!
- Top 10 OpenRCT2 Plugins, by Marcel Vos
- Top 5 Plugins for OpenRCT2, by Fidwell
The plugin was also featured in the following videos (grouped by plugin version):
v2.0
v1.1
- OpenRCT2 hacking: Self-powered shark, by Fidwell
- RCT2 Hacking Tutorial: Intamin Impulse with Holding Brake, by Brian Andrelczyk (CP6)
- RCT2 Hacking Tutorial: Diagonal and Triple Launch, by Brian Andrelczyk (CP6)
- Git Gud at OpenRCT2 #105: Turning any train into a powered train!, by Deurklink
v1.0
- Mini Vehicle Hacking Contest - The Results, by Deurklink and his DKMP community
- Git Gud at OpenRCT2 #95: Basic parking lots!, by Deurklink
- Git Gud at OpenRCT2 #93: Vehicle hacking with the Ride Vehicle Editor Plugin!, by Deurklink
v0.3
- The Joy of Hacking OpenRCT2: Vehicle Hacking 101, by Zarathustra
Tutorials
Copy & paste vehicles
To copy the settings of a vehicle to any other ride, you can use the copy and paste feature.
- Click the copy
 button to the left of the viewport.
- If a copy is currently selected, the button will be in the pressed state.
- Select another vehicle that you want to override.
- Click the paste
 button to the left of the viewport (the paper off the clipboard).
 - All settings from the copied vehicle will be pasted onto the currently selected vehicle.
Synchronize changes to multiple vehicles
By enabling the synchronize option, all changes made to the selected vehicle will also be applied to a specific set of other vehicles on the same ride.
- From the dropdown in the Apply & synchronize section, select the vehicles that should be updated alongside the currently selected vehicle.
- Enable synchronization by clicking the Synchronize button.
- Any changes you make to the selected vehicle, will instantly be applied to the other vehicles as well.
If you only want to synchronize specific settings, you can use the checkboxes in the Apply & synchronize section to limit what settings should synchronize.
Apply or copy and paste changes to multiple vehicles
With the Apply button it is possible to copy and paste the currently selected vehicle to multiple other vehicles in a single click.
- Select the vehicle you want to copy.
- From the dropdown in the Apply & synchronize section, select the set of vehicles where the settings should be pasted to.
- Optionally, use the checkboxes to specify which settings should be copied.
- Click the Apply button to copy and paste all settings to selected set of vehicles.
Move vehicles off the track
When a vehicle is in a stationary position, like waiting in a closed station, it is possible to move the vehicle off the track to another position on the map.
- Put the selected vehicle in a still-standing state, like waiting in a station.
- Use the clipper
 button to the left of the viewport to pick up the selected currently vehicle.
 - Place it down at a new location on the map.
For more detailed placement, it is recommended to use the X, Y and Z position settings.
Note: if a vehicle starts "moving" again (for example: leaving the station), it will teleport back to its appropriate position on the track. To make it work permanently, keep the vehicle stationary, by for example keeping the ride closed.

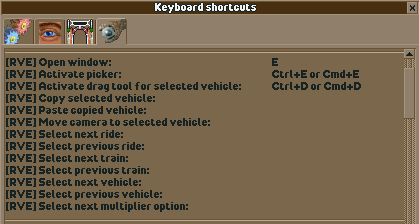
Keyboard shortcuts
The plugin supports various keyboard shortcuts to speed up working with the plugin. Some shortcuts already have a default key, but for most it's recommended to pick your own, to avoid any collisions!
To configure the keyboard shortcut keys:
- Open a park or scenario.
- Due to OpenRCT2 limitations, it's not possible to edit them in the main menu.
- Open the options window under the diskette
 icon in the top toolbar.
 - Go to the controls
 tab.
tab. - Click the Shortcut keys... button.
- Go to the wrench
 tab.
tab. - Find the shortcut keys marked with [RVE] and configure them to your desire!
Multiplayer! (How to setup)
This plugin supports multiplayer! A few key points to note:
- For the plugin to work in multiplayer, it needs to be installed on the server. Make sure it is installed in the plugin's folder of the server's user directory.
- When the server is started, the plugin will be distributed to every player joining the server. Players do not need to install the plugin for themselves.
- Players need the Ride Properties permission to be able to modify any vehicles.
- When a player who did not have the plugin before joining leaves the server, the plugin will be removed from the game.
- When the plugin is installed in singleplayer, but not on the server, the plugin will be disabled on the server.
FAQ
Does it transfer over save games?
Answer: yes, all changes will be saved with your save game.
Can someone who doesn't have the plugin still open my park after I edited my vehicles?
Answer: yes, all changes to vehicles will still work if the player does not have the plugin installed. The plugin is only required to make any new changes.
I want to add 100 to a vehicle's property without clicking a 100 times, how?
Answer: in the bottom right corner of the editor window, there's a dropdown with the value x1. Change it to x10 or x100 to add or subtract by tens or hundreds respectively. You can also hold down the [+] and [-] buttons.
Can I reset the changes I made to a ride?
Answer: yes, you can reset the ride by closing it twice (to remove the vehicles) and reopening it again. All vehicles will respawn with the original values.
Is this cheating?
Answer: yes, I suppose so. This plugin replaces a previous technique involving memory hacking, which is similar to how cheat engines work. This "cheat" is not active until you have made changes in the editor window though!
Can I still play without it when I have it installed?
Answer: yes, the plugin does not do anything if you do not open the editor window.
Is it safe to uninstall the plugin if I don't want it anymore?
Answer: yes, uninstalling the plugin (by removing it from the Plugins folder) does not break your game or save files.
For developers: building the source code
- Install latest version of Node and make sure to include NPM in the installation options.
- Clone the project to a location of your choice on your PC.
- Open command prompt, use
cdto change your current directory to the root folder of this project and runnpm install. - Run
npm run build(release build) ornpm run build:dev(develop build) to build the project.- For the release build, the default output folder is
(project directory)/dist. - For the develop build, the project tries to put the plugin into your game's plugin directory.
- These output paths can be changed in
rollup.config.js.
- For the release build, the default output folder is
User interface
This plugin makes use of the FlexUI framework to create and manage the user interface. It is automatically fetched from NPM with npm install.
Hot reload
This project supports the OpenRCT2 hot reload feature for development.
- Make sure you've enabled it by setting
enable_hot_reloading = truein your/OpenRCT2/config.ini. - Open command prompt and use
cdto change your current directory to the root folder of this project. - Run
npm startto start the hot reload server. - Use the
/OpenRCT2/bin/openrct2.comexecutable to start OpenRCT2 with console and load a save or start new game. - Each time you save any of the files in
./src/, the server will compile./src/plugin.tsand place compiled plugin file inside your local OpenRCT2 plugin directory. - OpenRCT2 will notice file changes and it will reload the plugin.
If your local OpenRCT2 plugin folder is not in the default location, you can specify a custom path in rollup.config.js.
Final notes
Thanks to wisnia74 for providing the template for this mod and readme. Thanks to the community for the enthusiasm for this plugin and their amazing creations.